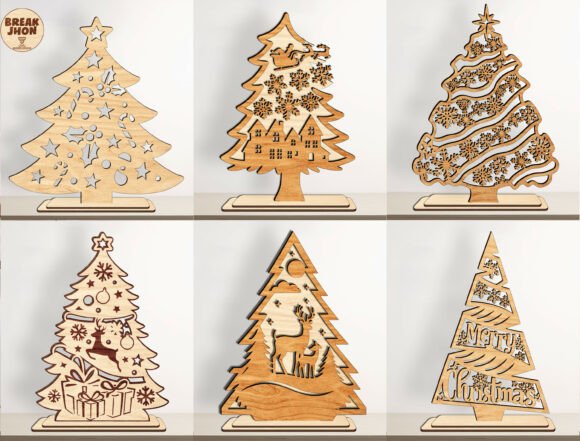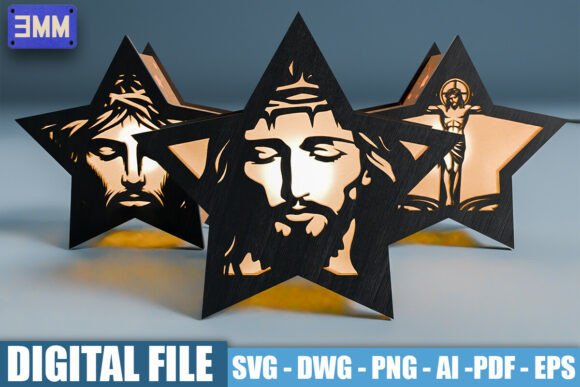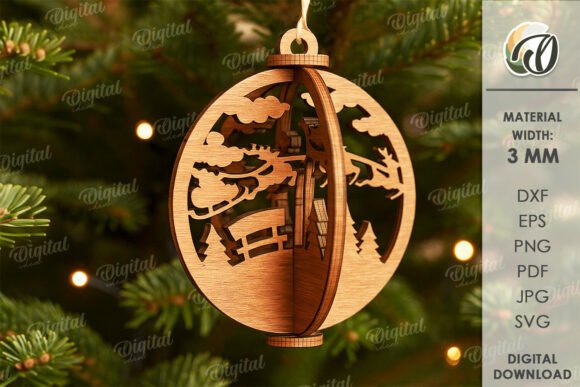
3D Christmas Ornament Laser Cut
The holiday season is often defined by the small, intricate details that make a space feel truly festive. While store-bought decorations have their place, there is a distinct satisfaction in creating something unique with your own hands. This is where 3D Christmas Ornament Laser Cut designs come into play, offering a bridge between digital precision and tangible artistry. It is important to clarify right away that this listing provides the digital tools for creation, not the physical ornaments themselves. You are purchasing a zip folder containing a single design file available in SVG, DXF, EPS, PDF, JPEG, and PNG formats. These files are intended to be used with laser cutters or CNC routers to bring your vision to life.
Understanding the medium is the first step toward successful execution. The material width required for this specific project is 3mm. This thickness is crucial because it determines how the pieces fit together, the structural integrity of the final ornament, and the visual weight of the design. A 3mm substrate—whether it be wood, acrylic, or dense foam board—provides enough rigidity to hold its shape while remaining light enough to hang on a tree without bending branches. By providing multiple file formats, this resource ensures compatibility with a wide range of software and hardware setups, allowing creators from different backgrounds to utilize the design effectively.
Unpacking the Creative Potential
Why choose a laser-cut approach for holiday decor? The primary advantage lies in the complexity and consistency that manual cutting simply cannot replicate. A well-designed vector file allows for intricate latticework, precise geometric patterns, and seamless interlocking joints. When you engage with 3D Christmas Ornament Laser Cut projects, you are not just making a decoration; you are engaging in a process of problem-solving and aesthetic refinement. The "3D" aspect refers to the assembly of flat layers into a volumetric object. This layering technique adds depth, shadow, and dimension, transforming a simple silhouette into a sculptural piece that catches light beautifully.
The versatility of these digital files means they can be adapted to various styles and themes. While the provided design is ready for immediate use, the underlying principles apply to countless variations. You might choose to stain the wood to highlight the grain, paint it in traditional reds and greens, or leave it natural for a minimalist Scandinavian look. The possibilities of creation are endless when you consider the finish as part of the design process. For instance, using translucent acrylic can turn the ornament into a lantern-like object that glows when placed near a candle or fairy lights, adding a magical element to your holiday display.
Practical Applications Beyond the Tree
While hanging an ornament on a Christmas tree is the most obvious use case, the applications for these laser-cut designs extend far beyond traditional holiday decor. Consider the potential for home staging or interior design. A large-scale version of such an ornament, perhaps scaled up and mounted on a wall, can serve as a striking focal point in a living room or entryway during the winter months. Educators and hobbyists can use these files to teach geometry, spatial reasoning, and fabrication skills. Students can learn about tolerance, fit, and assembly while creating a functional object.
For small business owners and entrepreneurs, these designs offer a low-barrier entry into the handmade market. If you have access to a local makerspace or a personal laser cutter, you can produce a series of ornaments tailored to specific niches. Think of corporate gifts, boutique hotel lobbies, or themed parties. The ability to customize materials allows you to target different price points and aesthetics. A luxury client might appreciate a polished walnut ornament with gold leaf accents, while a family-friendly event might prefer colorful painted MDF. By keeping results clear and organized in your production workflow, you can scale these creations efficiently without sacrificing quality.
Adapting for Different Audiences and Contexts
Different users will approach this digital asset with varying goals. Designers and marketers might use the PNG or JPEG previews for mockups to showcase their services or promote their own laser-cutting businesses. Bloggers and content creators can document the build process, sharing tips on material selection and finishing techniques. This creates valuable content that resonates with audiences looking for inspiration or DIY ideas. The key is to present the information in a way that is audience-friendly and visually appealing.
Educators can integrate these files into STEM (Science, Technology, Engineering, and Mathematics) curricula. The mathematical precision required for laser cutting offers a practical application for concepts like coordinates, scaling, and symmetry. Freelancers and publishers might find value in the vector formats (SVG, EPS) for incorporating the design into larger graphic projects or publications related to crafts and holidays. Regardless of your role, the goal is to leverage the design’s flexibility to meet specific needs. Whether you are aiming for a professional portfolio piece or a heartfelt homemade gift, the foundation remains the same: a well-structured digital file waiting to be realized in the physical world.
Best Practices for Assembly and Finish
To ensure your final product looks professional, attention to detail during the assembly phase is paramount. Since the material width is fixed at 3mm, verify that your laser cutter settings account for kerf—the amount of material vaporized during cutting. Most modern slicing software includes kerf compensation, but it is wise to test cut a small section before committing to the entire design. Proper fitting ensures that the layers slide together smoothly without excessive gaps or forced fits that could crack the material.
Once assembled, consider the finishing touches. Sanding the edges can remove any burn marks or roughness left by the laser, resulting in a smoother tactile experience. Depending on the material, you might apply a clear coat to protect the surface or add embellishments like ribbons, beads, or metallic paints. Remember that consistency is key to a cohesive look. If you are producing multiple ornaments, try to maintain uniformity in color and finish across the set. This organizational approach elevates the perceived value of the work, whether it is for personal enjoyment or commercial sale.
Thank you for visiting my store and considering this digital resource. Please write me a message if you have a question regarding file compatibility, material suggestions, or assembly techniques. I am here to support your creative journey. Happy shopping, and may your holiday creations bring joy and inspiration to everyone who sees them.